NLDD Blog

Shade Matching - Part 1
Wednesday, December 7, 2011
Shade Matching
At the fall MACDL meeting, I was privileged to speak on the topic of Shade Matching. I introduced the listeners to our patient Heather who needed two teeth restored #8#9. Knowing a lot of the participants wanted to follow up with how this case went, I thought I would post the results here for you to see.
To briefly recap for those who might have missed it, I went through some of the steps & rationale for restoring her teeth. I chose to fabricate veneers on refractory due to the thickness of the restorations, and the ability to control the translucency and opacity selectively using layering materials.
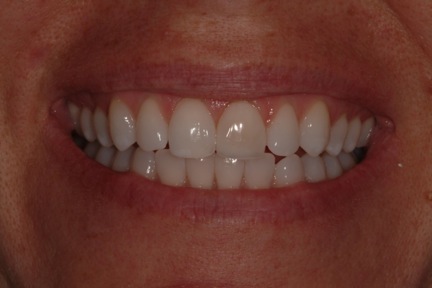
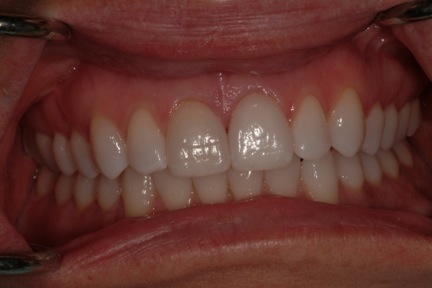
She was unhappy with discoloration on #9, which was intensified after the old veneer was removed and prepped.
During the class we stressed the importance of gathering information from as many sources as possible such as:
1)An in person visit relying on memory on how the teeth looked,
2)Written and sketched notes from our visit and
3)Photography.
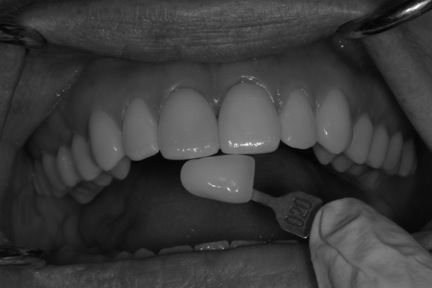
Since this patient was at an office across the country, I didn’t have the opportunity to see her in person. Pictures from her visit with the dentist were provided to me, which gave me ample information. Only a few are shown here for the sake of space. These included both retracted and non-retracted images at different angles with a variety of shade tabs. The angle the camera is held at in relation to the tooth is important because it is best to minimize the amount of reflections coming from the flash on the tooth surface. It is very difficult to see colors & detail if there are multiple reflections from the flash. The only time I find these reflections helpful is in evaluating surface texture & luster.
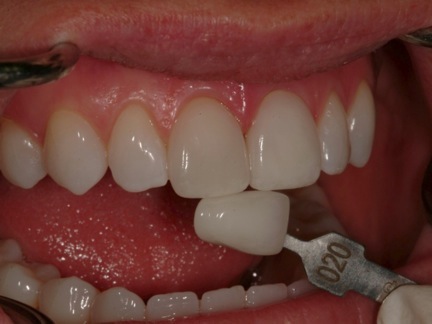
During the course we talked about dehydration as our enemy for accurate shade pictures, resulting in a whitish, chalky, higher valued tooth. Shots taken toward the end of the patient’s visit and after the prep showed more dehydration.

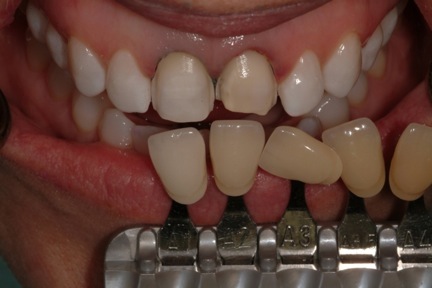
Notice the dehydrated look in the adjacent teeth compared to the previous image.
We discussed three critical stages in creating the restorations:
The Information stage (Photos, notes, recollections)
The Interpretation stage
The Implementation stage
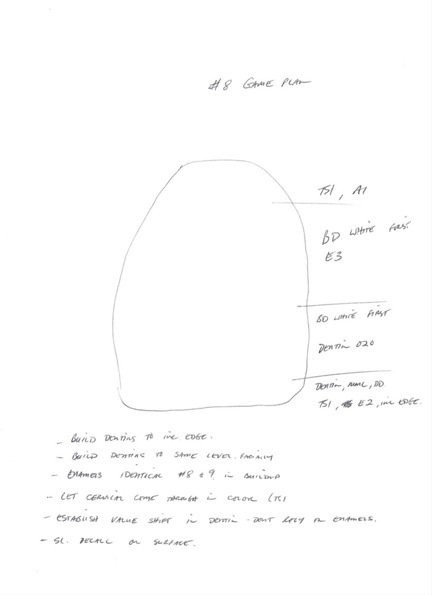
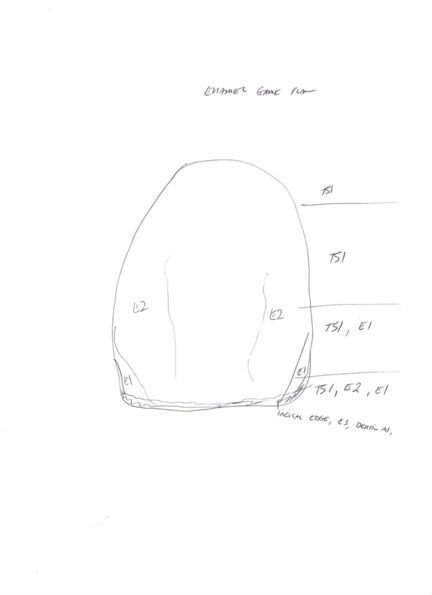
Each stage is important in matching the natural tooth. After reviewing these images, the Information stage gives way to the Interpretation stage where I drew up what I call a “game plan” that would identify how to restore the teeth. Knowing your porcelain kit is critical in order to recreate nature’s look at this stage. Since photos of unrestored #8 were included, this became our goal for restoring both #8&9 in appearance. The visible effects were correlated to specific porcelains that would achieve the desired goal, taking into account hue, value, chroma and special effects. This sometimes takes a little time, but afterward, the veneers were layered, contoured, glazed & polished in the Implementation Stage according to the game plan. A key lesson for this stage is to know how much material is required to achieve a certain effect.

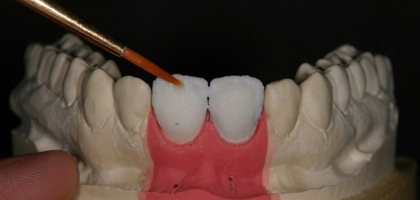
Brilliant dentin and regular dentins are applied to bring #9 to similar shape of #8 and to mask discoloration.
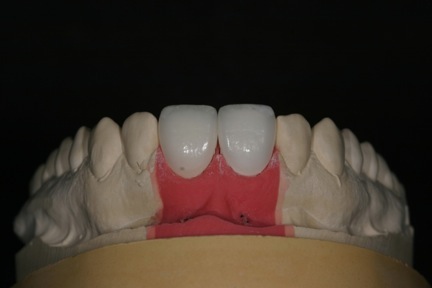
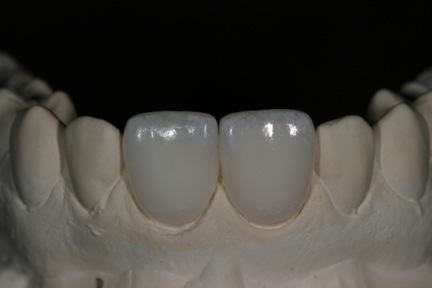
Finished veneers (still on refractory dies)
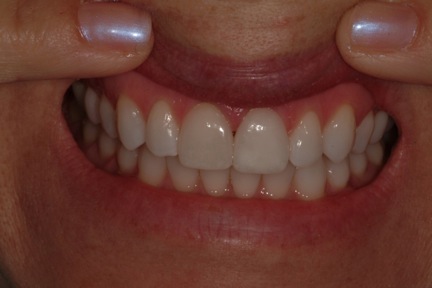
Here are some pictures from the tryin. At this point, a survey of strong points and weak points are compiled. Thought is given whether to make adjustments to the current veneers or make a new set.
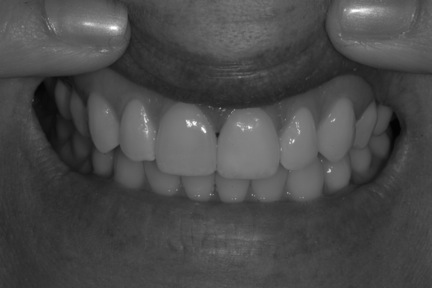
# 9 veneer did a great job of masking the strong chroma of the prep, however maybe a little too much resulting in slightly higher value overall. B&W effect is used mainly to evaluate value.
#8 was lower in value than desired, which came as a surprise as no masking porcelains were used. This tooth had some high value reigons on the stump, but their effect on the final crown was overestimated.
Details such as value shift within the restoration and surface decalcification were satisfactorily reproduced. The overall texture of the restorations was too strong and needed to be reduced.
Based on the images it was determined to make a new set of veneers to achieve the corrections. It is well known that when feldspathic veneers are fired after the refractory material is removed, fit issues will occur, even when low fusing materials are implemented. To make corrections in this case would require multiple firings which would compromise accuracy. This is one of the major drawbacks to the refractory technique.
Staining the surface of the restoration may bring the colors more in line with the adjacent teeth, but the effect of this would be to lose the natural appearance of a tooth with its vitality coming from within. The decision to make a new set was the obvious choice.
The notes from the first buildup were referred to in creating the new set. The amount of material used to create the masking effect was reduced in tooth #9, and adding some of the effect to #8 in the initial firings. This was demonstrated to the course attendees and was accomplished with a thin layer of Brilliant Dentin White (IPS d.sign Ivoclar Vivdent). To see the effect of this material, observe the inside of the finished veneers. All other buildup details were replicated as best as possible. In the final stage, the surface texture was reduced to simulate the original and adjacent dentition.
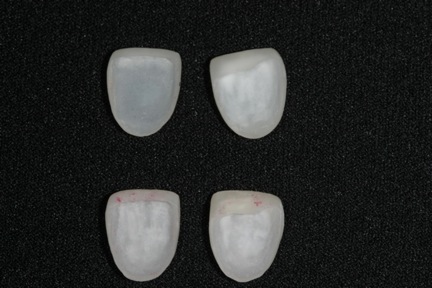
The first set is pictured above the second set.
The finished second set was sandblasted & etched then sent (along with the first set) for the next appointment.
In the next post, as I will show pictures of the second set.
Till next time, all the best!
Gordon Russell BS., RDT
Buildup of veneers on #8 & 9 on refractory dies.

